Here is a ranking by average power use.
kW - Pulling from
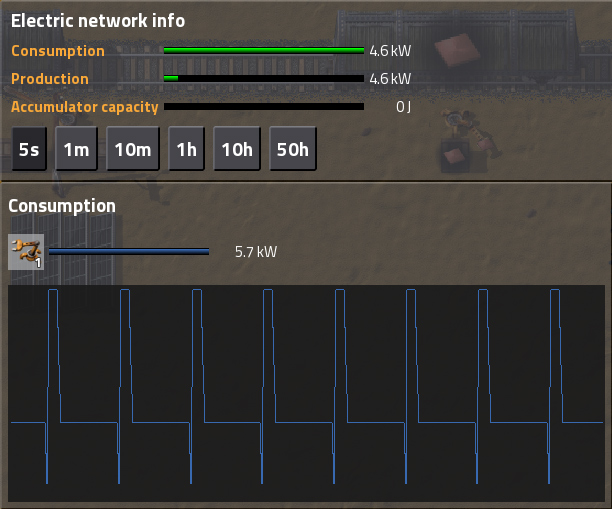
4.7 - End of belt far side
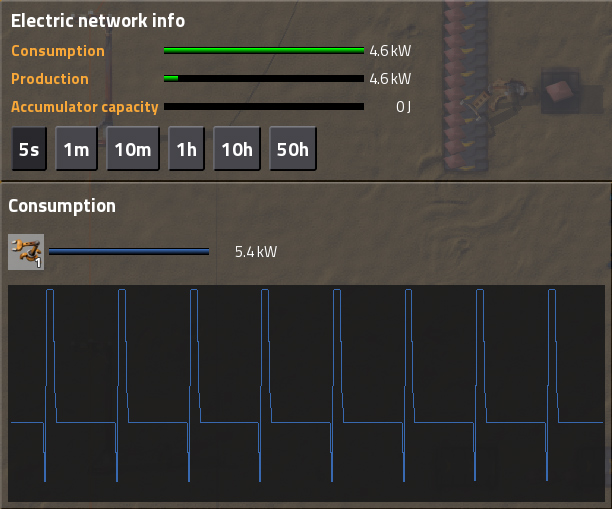
5.4 - Full belt far side
5.7 - Cargo wagon center
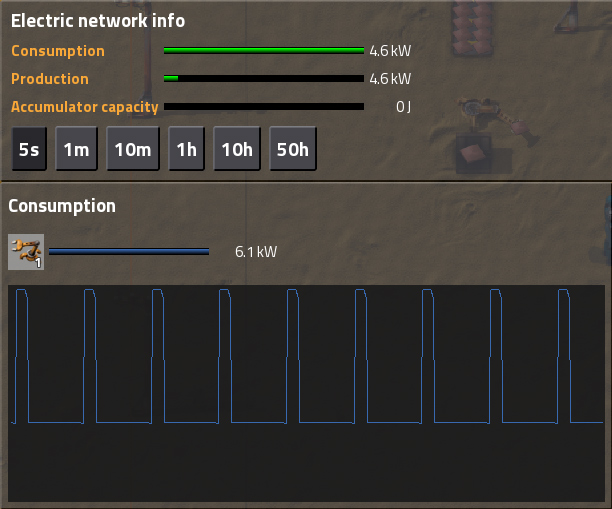
6.1 - End of belt center
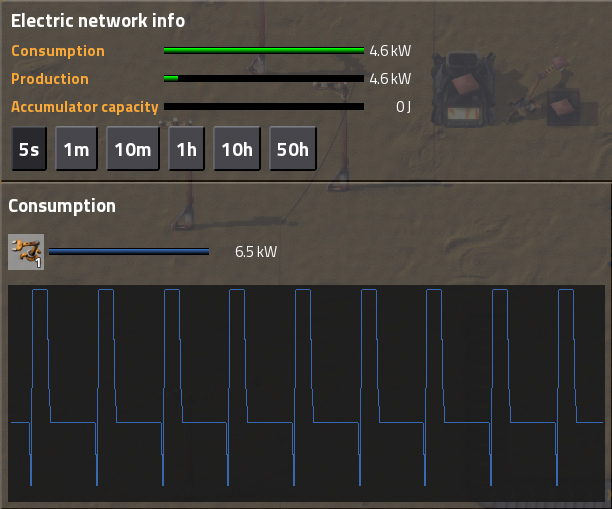
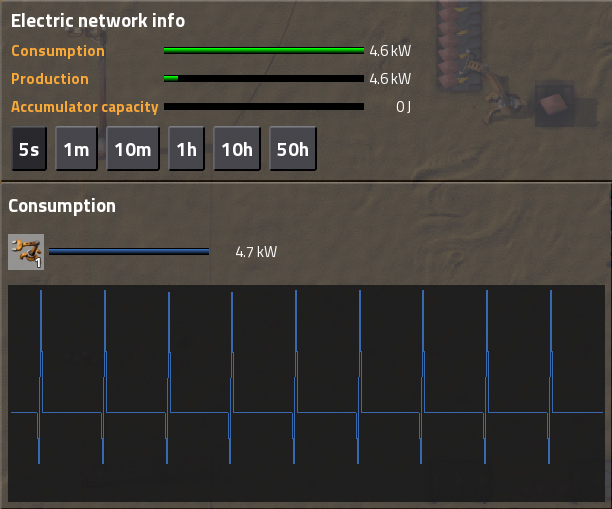
6.5 - 2x2 building
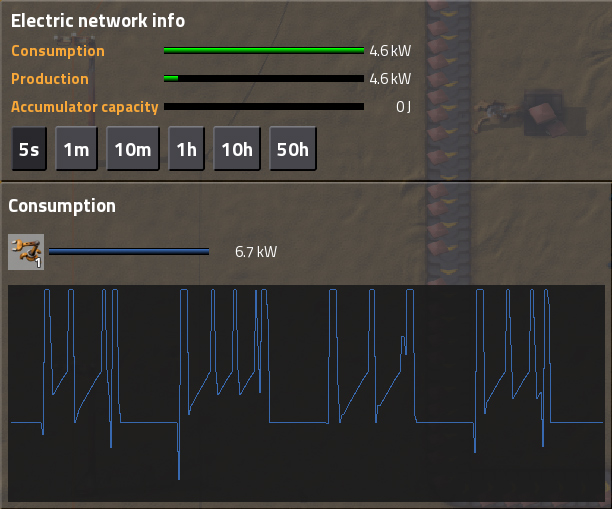
6.7 - Moving belt far side
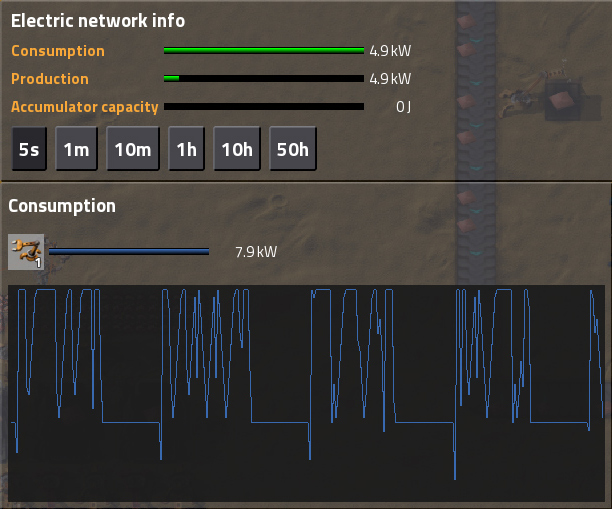
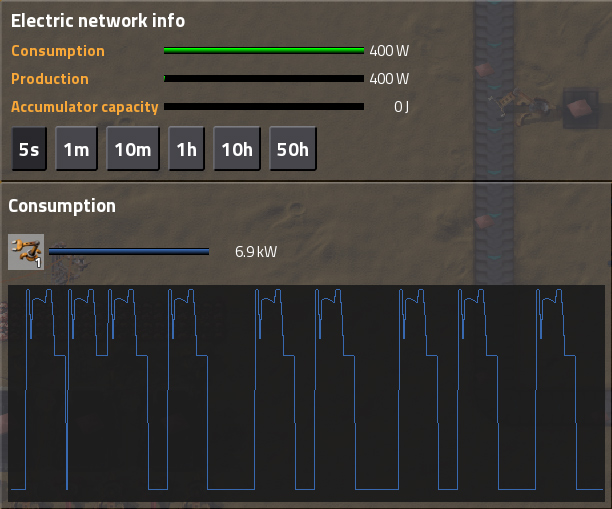
6.9 - Sparse express belt far side (FAIL)
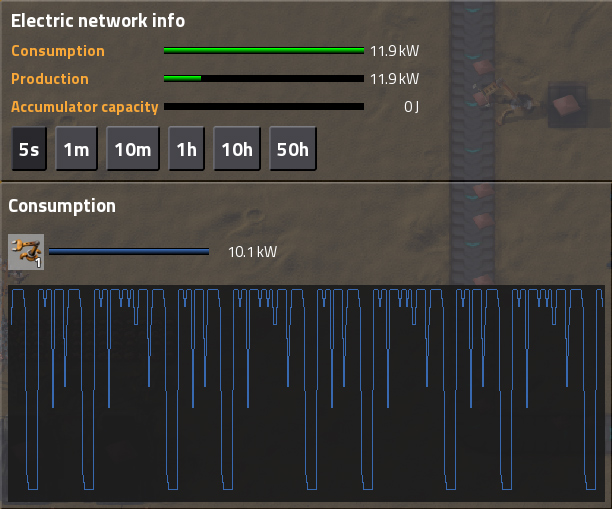
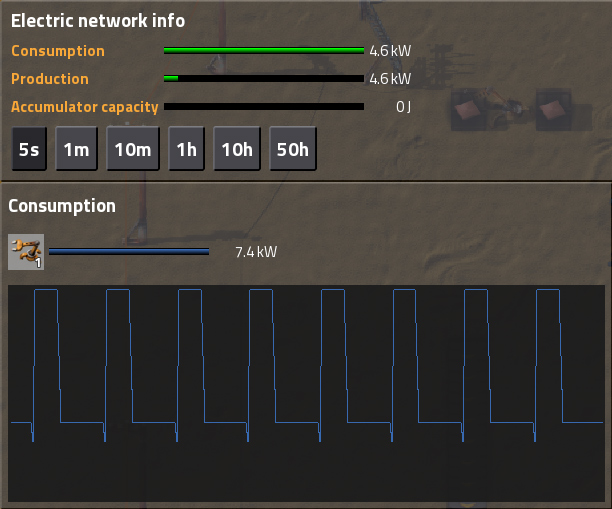
7.4 - Chest
7.9 - Crowded express belt far side
8.8 - End of belt near side
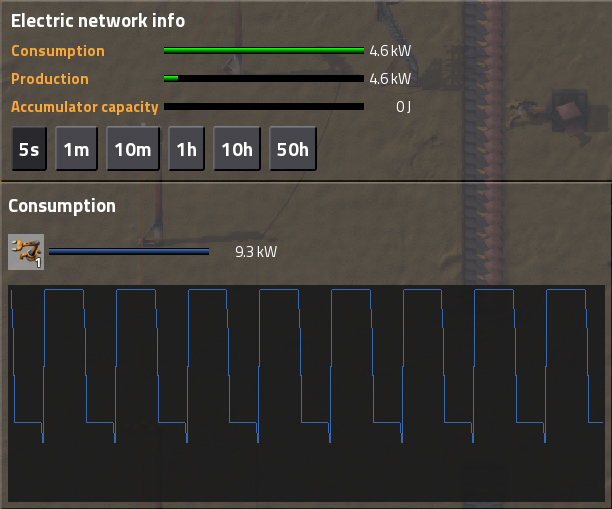
9.3 - Full belt near side
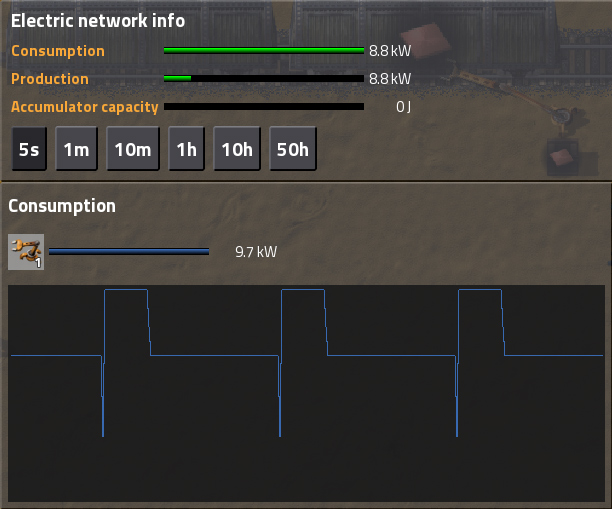
9.7 - Cargo wagon corner
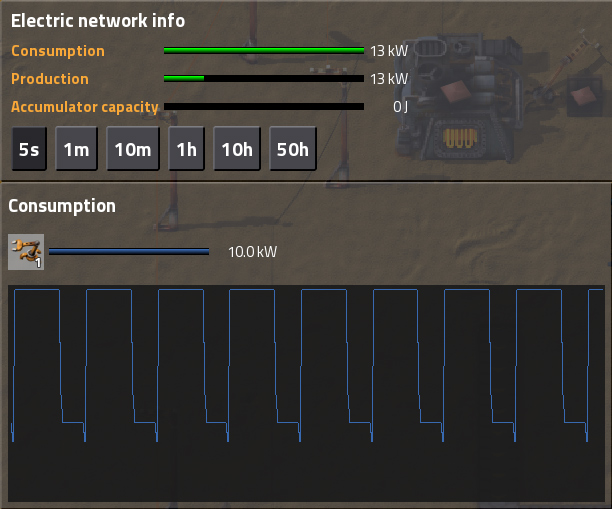
10.0 - 3x3 building
10.1 - Sparse express belt near side (FAIL)
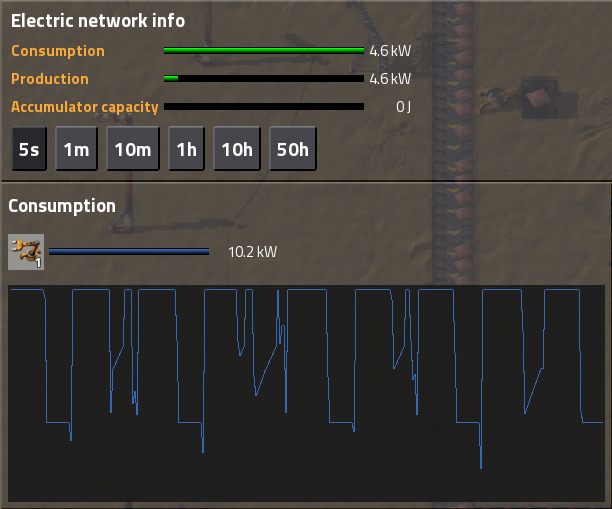
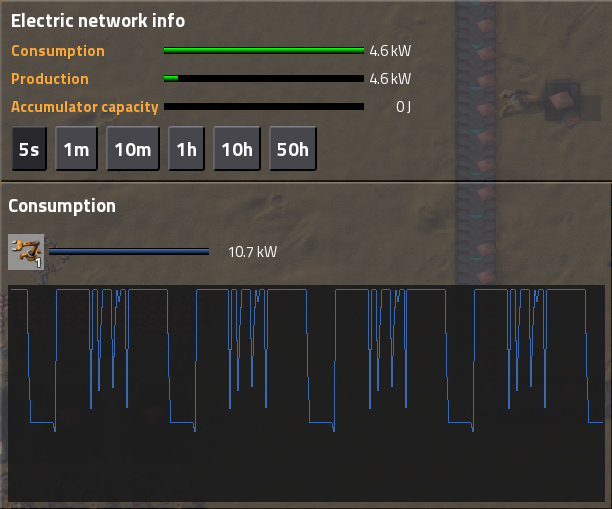
10.2 - Moving belt near side
10.7 - Crowded express belt near side
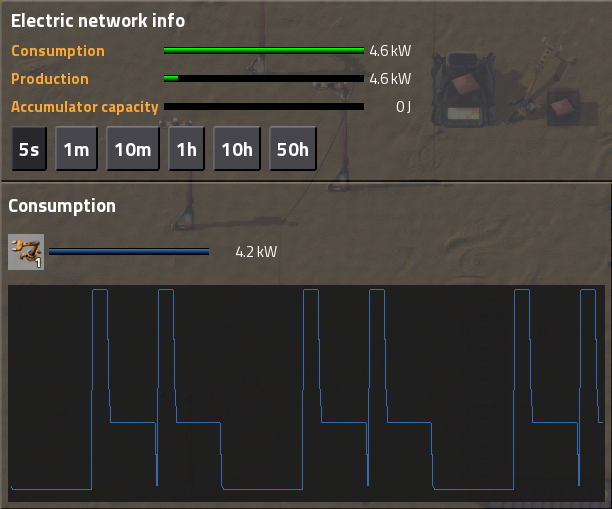
varies - Building slower than the inserter
If you graph an inserter on its own power network, it looks like an EKG. And they are all different.
Building slower than the inserter
2x2 building
Chest
3x3 building
Cargo wagon center
Cargo wagon corner
End of belt far side
End of belt center
End of belt near side

Full belt far side
Full belt near side
Moving belt far side
Moving belt near side
Crowded express belt far side
Crowded express belt near side
Sparse express belt far side (FAIL)
Sparse express belt near side (FAIL)