
This set of tiles all have the input lines going the OPPOSITE direction of the output lines, so that they can point at the main bus that the inputs are fed from. I have versions of these with the inputs and outputs pointed in the same direction as well.
2 belts out, 1 belt in per side
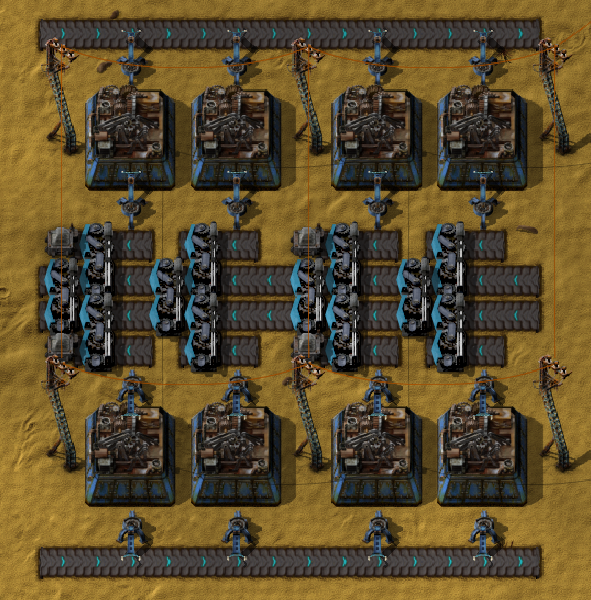
Blueprint: http://factorioblueprints.com/view/FtKYChMcnj57YjrhR
2 belts out, 2 belts in per side
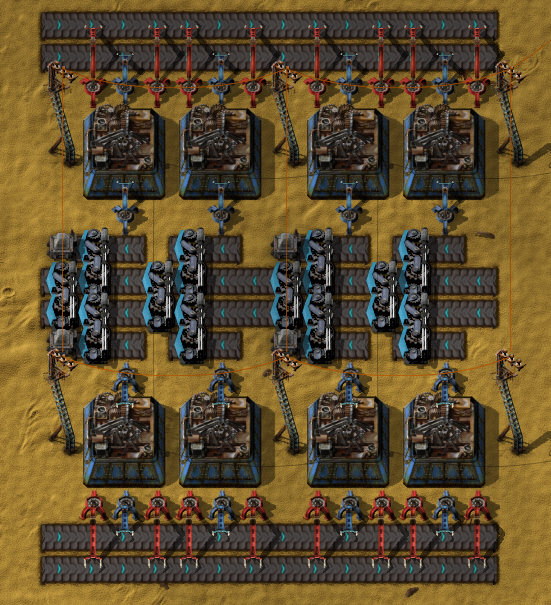
Blueprint: http://factorioblueprints.com/view/3nkeEFxzqB9CtQyDH
2 belts out, 1 belt in per side + requester chests
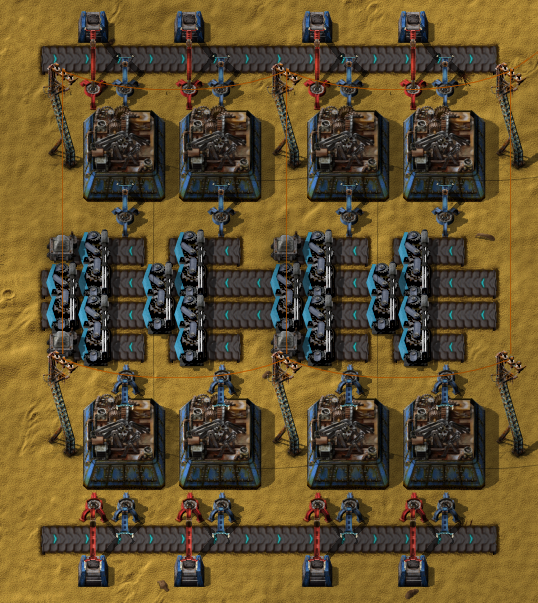
Blueprint: http://factorioblueprints.com/view/TcmH2csYb5TXj7npn
2 belts out, 1 belt in per side + fluid input
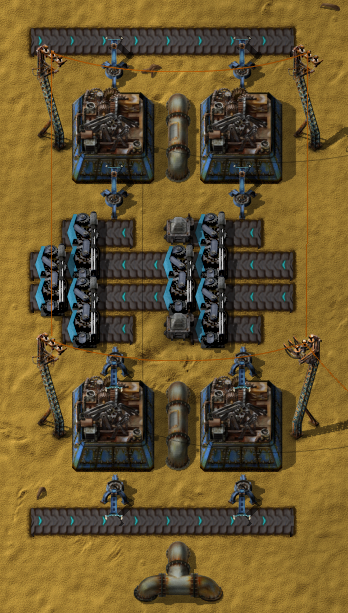
Blueprint: http://factorioblueprints.com/view/modpsjCeHF9kShxEf
The belt compression calculations for each blueprint are in their description on the Factorio Blueprints website. As noted there, they assume that you can definitely provide all the inputs (even if the input belts in the design are not enough), and that no modules or beacons are used. So they are the MAXIMUM number of tiles you will need for a given assembler tech level.
