
For the longest time I was constructing my train station ore dropoffs like this:
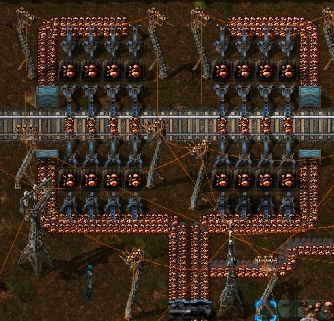
Good enough for government work, right? The trouble is that while it (eventually) fills all of the crates, it takes a while to feed the second line because the first line takes priority, and if your mining base starts to get exhausted to the point where you're not producing as much as you're transporting, the far side crates tend to not refill, which means they'll eventually empty; meaning that your trains take twice as long to load up.
This:
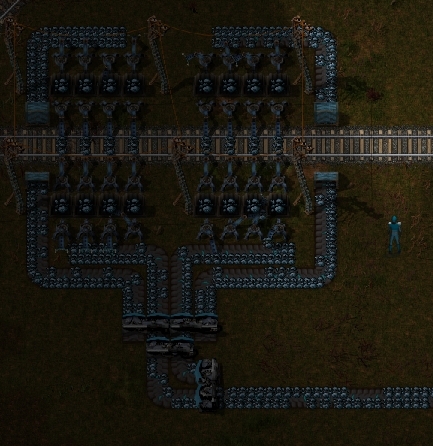
is far better: both rows of crates fill up equally from the get-go, and that means that your trains spend less time at the station from the first trip they make. Incidentally, a carriage being loaded by 8 crates takes just a fraction over 15 seconds to fully load/unload when you've researched every inserter stack size tech.
As for smelting, this:
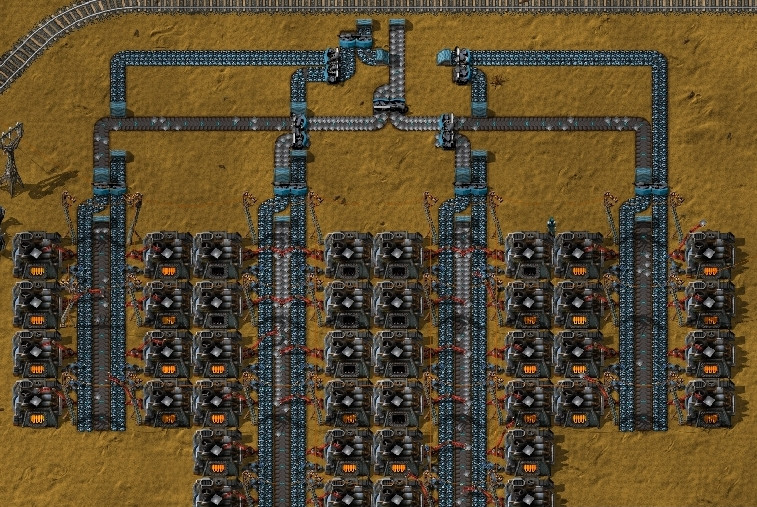
works really, really well for me. It's constructed out of two blueprint templates: the mess of conveyers and splitters up top that take in one input belt and one output belt, and the following template:
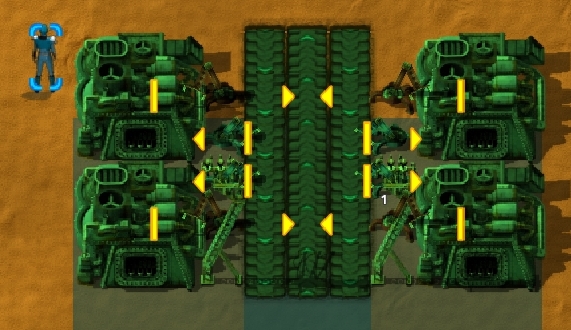
It's got excellent, perfectly balanced throughput, is easily optimised by filling out new rows before adding new columns, and most importantly four templates (i.e. 8*2 smelters) side-by-side fits snugly within the maximum spacing for roboports that link up together.
+Any comments/tips for further optimisation?


