Testing science- and energyefficiency of chained science lab
Posted: Tue May 02, 2017 5:30 pm
Hi there.
I did some testing regarding laboratory chains and other similar setups. Here are my findings:
Basically this answers the following questions: How long can/should you chain labs? Whats the use? How good is it compared to direct insertion?
- You should always build blocks of labs instead of single lines because they are way more efficient.
- Its really ressource efficient, fast to build manually, easy to extend, uses less "volume" (smaller, compared to setup with four belts and four inserters)
- Its a certain stated percentage as good as direct insertion. This values can be used to deduce efficiencys of other researches.
Note: All tests were made with all research done using Creative-mod. Except infinite research: I used mining-productivity research to test everything because it needs six different packs. Please be aware that these findings only apply to research with six different science packs with equal need. In different researches the numbers change according to need.
I deliberately chose this setup for the late game in mega bases where mining productivity is a key for maintenance.
All numbers are taken from the 10min graph of the power consumption dialog and averaged. I dont know a better way to measure use of labs. I used the consumption of the labs in a setup where I directly insert in each lab as a
Remember not to loop the labs. This can stop them from working.
I started chaining 400 labs with 3 stack-inserter each and found that the science-pack distribution follows a sawtooth-wave like pattern. Because at some point the last lab will run out of a science pack and the inserter will grab the entire inventory of this pack out of the adjacent laboratory. (I know what you think: What if you change stacksize? Nope, no difference.)
I found that about 50% are not working because the inserters constantly pull pack out of them. I call this efficiency from now on and put this into relation to labs that have direct insertion. ("speed" works fine too)
Here is a picture of the sawtooth-wave like behaiviour. Looks like its leveling over time:
Lowering the number of labs did nothing good until I reached about 20. Here the efficiency started reaching reasonable amounts: ~86% (error 5%)
Because the power consumption dialog swaps to MW, essentially lowering my measurement accuracy to about +-5%, I used 16 labs from now on to test things thoroughly which put me at 960kW max., lowering the error to something about 0.1 or 0.2%
- 16 labs in a row, chained by three stack-inserter (Stack size: 12) each: 91% efficiency, essentially making one and a half of them wasted ressources.
- Using fast-inserters the efficiency dropped to 88.6%.
Because one and a half of the labs were waste, I decreased the number to ten:
- With 10 labs in a row, chained by three stack-inserter (Stack size: 12) each: 94.5% efficiency, "wasting" only half a lab.
- Test using stack-inserters with lowering stack size (10 to 2) shows a decrease in efficiency to 94.15% instead of 94.5%
- Test using stack-inserters with lowering stack size (9 to 1) shows a decrease in efficiency to 94.3% instead of 94.5%
-------------------
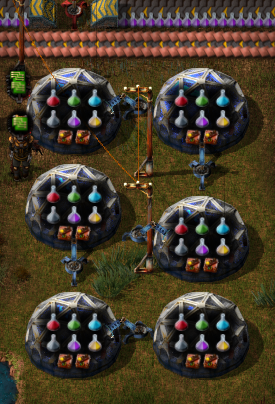
I realized this is not a good way of doing it after a guy named "sEiNZu | phanYuuh" showed me his setup: A grid of 4x4. That would obviously be better than a simple row. (See picture below)
Grid of 3x3, 9 labs in total is 97.2% efficient. (Way better already)
Grid of 5x5, 25 labs in total: This is more difficult since the power consumption is over 1MW and I lose accuracy. With these numbers alone the setup would be 100% efficient: 1.4MW in the grid and 1.4MW with direct insertion of 25 labs. But that is not the case, therefore I used the graph instead - as a visual measurement.
Because the amount of inserters in this setup is extremely high, I tested three different versions: Three inserter each, two inserter each and one inserter each. I pasted the graphs in one picure for easy comparison:
It looks like all three are equal. One stack-inserter seems to be enough. Also a grid of 5x5 appears to be the best amount because the higher you go, the higher the loss. It looks like about 94% efficient - the graph from the 10-in-a-row setup didnt look much different. Thats good.
Conclusion: If you want to save one-time ressources, arrange the labs in a grid of 5x5. Paste it four times with the input in the middle and you're good to go.

I know it doesnt have military science there..
-------------------------
EDIT: I realized that a grid 5x5 is quite bad when researching a science like "follower robot count". (7 packs, 30s) The efficiency drops to about 90%, judging by the looks of the graph. :/ I would say a grid of 4x4 would be the best solution then for lategame.
-------------------------
ENERGY EFFICIENCY:
I was wondering if lab setups with beacons really are more energy efficient than setups without beacons as some people here stated. So I tested it.
I tested four different setups. Popular ones and some others.
I use a fixed amount of energy stored in accumulators. The accumulators have a capacity of 1750MJ. The amount of research done with this amount of Energy is shown in the picture.
Every lab has two productivity modules and every beacon two speed modules. I chose "follower robot count" because it uses all seven science packs and only needs 30s per pack. Its a good benchmark research.
The best setup uses only Beacons that reach at least 6 Labs.
I also tried measuring the science pack consumption using combinators. (The setup can be found as a blueprint on Page three or four) This is not accurate due to the productivity modules increasing the amount of research done, but being unmeasureable by counting.
I did some testing regarding laboratory chains and other similar setups. Here are my findings:
Basically this answers the following questions: How long can/should you chain labs? Whats the use? How good is it compared to direct insertion?
- You should always build blocks of labs instead of single lines because they are way more efficient.
- Its really ressource efficient, fast to build manually, easy to extend, uses less "volume" (smaller, compared to setup with four belts and four inserters)
- Its a certain stated percentage as good as direct insertion. This values can be used to deduce efficiencys of other researches.
Note: All tests were made with all research done using Creative-mod. Except infinite research: I used mining-productivity research to test everything because it needs six different packs. Please be aware that these findings only apply to research with six different science packs with equal need. In different researches the numbers change according to need.
I deliberately chose this setup for the late game in mega bases where mining productivity is a key for maintenance.
All numbers are taken from the 10min graph of the power consumption dialog and averaged. I dont know a better way to measure use of labs. I used the consumption of the labs in a setup where I directly insert in each lab as a
Remember not to loop the labs. This can stop them from working.
I started chaining 400 labs with 3 stack-inserter each and found that the science-pack distribution follows a sawtooth-wave like pattern. Because at some point the last lab will run out of a science pack and the inserter will grab the entire inventory of this pack out of the adjacent laboratory. (I know what you think: What if you change stacksize? Nope, no difference.)
I found that about 50% are not working because the inserters constantly pull pack out of them. I call this efficiency from now on and put this into relation to labs that have direct insertion. ("speed" works fine too)
Here is a picture of the sawtooth-wave like behaiviour. Looks like its leveling over time:
Lowering the number of labs did nothing good until I reached about 20. Here the efficiency started reaching reasonable amounts: ~86% (error 5%)
Because the power consumption dialog swaps to MW, essentially lowering my measurement accuracy to about +-5%, I used 16 labs from now on to test things thoroughly which put me at 960kW max., lowering the error to something about 0.1 or 0.2%
- 16 labs in a row, chained by three stack-inserter (Stack size: 12) each: 91% efficiency, essentially making one and a half of them wasted ressources.
- Using fast-inserters the efficiency dropped to 88.6%.
Because one and a half of the labs were waste, I decreased the number to ten:
- With 10 labs in a row, chained by three stack-inserter (Stack size: 12) each: 94.5% efficiency, "wasting" only half a lab.
- Test using stack-inserters with lowering stack size (10 to 2) shows a decrease in efficiency to 94.15% instead of 94.5%
- Test using stack-inserters with lowering stack size (9 to 1) shows a decrease in efficiency to 94.3% instead of 94.5%
-------------------
I realized this is not a good way of doing it after a guy named "sEiNZu | phanYuuh" showed me his setup: A grid of 4x4. That would obviously be better than a simple row. (See picture below)
Grid of 3x3, 9 labs in total is 97.2% efficient. (Way better already)
Grid of 5x5, 25 labs in total: This is more difficult since the power consumption is over 1MW and I lose accuracy. With these numbers alone the setup would be 100% efficient: 1.4MW in the grid and 1.4MW with direct insertion of 25 labs. But that is not the case, therefore I used the graph instead - as a visual measurement.
Because the amount of inserters in this setup is extremely high, I tested three different versions: Three inserter each, two inserter each and one inserter each. I pasted the graphs in one picure for easy comparison:
It looks like all three are equal. One stack-inserter seems to be enough. Also a grid of 5x5 appears to be the best amount because the higher you go, the higher the loss. It looks like about 94% efficient - the graph from the 10-in-a-row setup didnt look much different. Thats good.
Conclusion: If you want to save one-time ressources, arrange the labs in a grid of 5x5. Paste it four times with the input in the middle and you're good to go.
I know it doesnt have military science there..
-------------------------
EDIT: I realized that a grid 5x5 is quite bad when researching a science like "follower robot count". (7 packs, 30s) The efficiency drops to about 90%, judging by the looks of the graph. :/ I would say a grid of 4x4 would be the best solution then for lategame.
-------------------------
ENERGY EFFICIENCY:
I was wondering if lab setups with beacons really are more energy efficient than setups without beacons as some people here stated. So I tested it.
I tested four different setups. Popular ones and some others.
I use a fixed amount of energy stored in accumulators. The accumulators have a capacity of 1750MJ. The amount of research done with this amount of Energy is shown in the picture.
Every lab has two productivity modules and every beacon two speed modules. I chose "follower robot count" because it uses all seven science packs and only needs 30s per pack. Its a good benchmark research.
The best setup uses only Beacons that reach at least 6 Labs.
I also tried measuring the science pack consumption using combinators. (The setup can be found as a blueprint on Page three or four) This is not accurate due to the productivity modules increasing the amount of research done, but being unmeasureable by counting.