Page 1 of 1

[Done] Image Offset / Selection Box - Help

Posted: Thu May 17, 2018 5:48 pm
by TheSAguy
Hi,

I really suck at getting my image size/offsets correct.
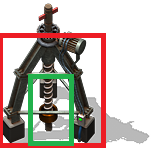
I have the attached drill image. The image plus shadow is 155x155, but if you leave off the shadow, it's more like a 155 x 100 (w x h)

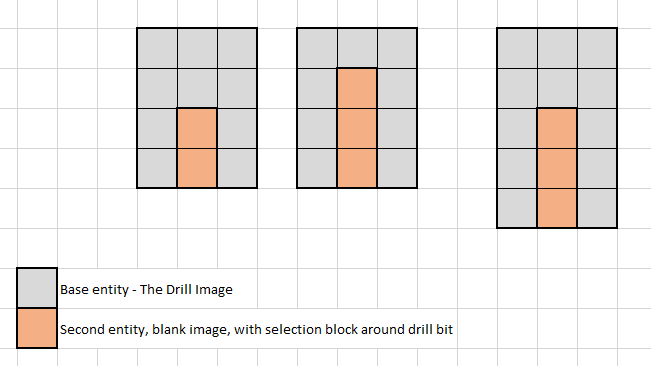
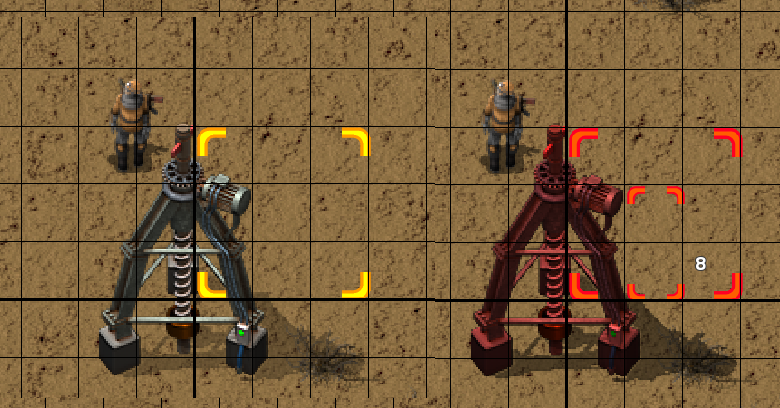
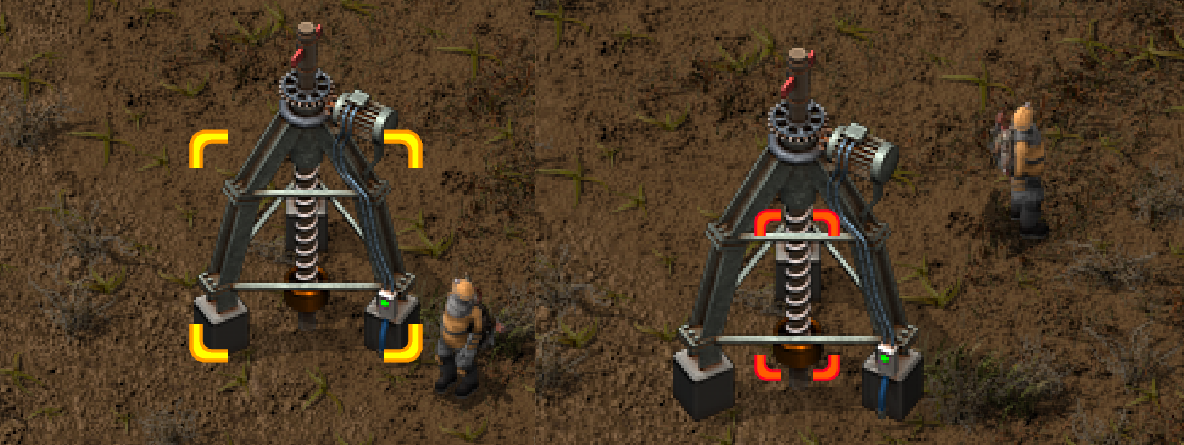
I want to create an entity that's or a 3 x 4 or a 3 x 5, not sure what will look better. but then I want to create a secondary entity, it will be hidden, with no image, but a selection box of 1x2, (maybe a 1 x 3) right over the drill bit of the main image.

So I'll have a Base (X) and drill. (O)
Layout
Given this, how will I scale my image and do my Collision box code?
Not sure if I should upload the image or Mod, please let me know.

Code: Select all

animation =
    {
      layers =
        {
		{
          filename = "__Bio_Industries__/graphics/entities/bio_drill/bio_drill_entity.png",
          priority = "high",
          width = 100,
          height = 155,
          frame_count = 16,
          line_length = 4,
		  --shift = util.by_pixel(?, ?),
		  --scale = ??
          hr_version =
          {
			  filename = "__base__/graphics/entity/assembling-machine-2/Bio_Drill.png",
			  priority = "high",
			  width = 100,
			  height = 155,
			  frame_count = 16,
			  line_length = 4,
			  --shift = util.by_pixel(?, ?),
			  --scale = ??
          }
        },
		},
    },
Thanks.

Re: Image Offset / Selection Box - Help

Posted: Fri May 18, 2018 2:55 pm
by darkfrei
Please add pictures that you have and show what center you want.

Re: Image Offset / Selection Box - Help

Posted: Fri May 18, 2018 3:59 pm
by TheSAguy
I'm having an issue combining the individual images, the background in not staying transparent, so I've attached the individual images.

Here is my current code. (This is using an assembler, and burner drill.) I now have the drill image, so will replace this.

Code: Select all

    --- Drill has been built
	if entity.valid and entity.name == "bi-drill-base" then
	writeDebug("Drill has been built")
		   

		local drill_bit_name = "bi-drill-radar"  
		local drill_base = entity 

		local position_c = {position.x + 0.45, position.y + 0.13}
		local create_drill_bit = surface.create_entity({name = drill_bit_name, position = position_c, direction = entity.direction, force = force})
	
		create_drill_bit.minable = false
		create_drill_bit.destructible = false
		
		global.bi_drill_table[drill_base.unit_number] = {inventory=drill_base, drill_bit=create_drill_bit}
	
	end
The new config will only use the 1 image for the base and the drill-bit (second created entity) will just be a blank selection box of 1x2 or 1x3 around the bit part of the drill.
So the result should look something like this:
Not sure if the final entity will be 3x4 or 3x5 and if the drill will be 1x2 or 1x3:
Image

So the final result will be something like:
Image

Mod also attached. The entities are: \Bio_Industries_2.5.4\prototypes\Bio_Drill\entities.lua - The first two entities. The first one is the "drill-bit" and the second the "base"

Thanks!

Re: Image Offset / Selection Box - Help

Posted: Fri May 18, 2018 7:00 pm
by darkfrei
You have sprites:
2018-05-18 20_32_07-drill images.png
2018-05-18 20_32_07-drill images.png (37.13 KiB) Viewed 1549 times
Download and unpack this program Factorio_IMagick_best_spritesheet:
viewtopic.php?f=34&t=5336&start=20#p335708

Put your sprites to folder /Input and run 4x4 or 4x8 script (first 4 is width and you have 16 or less sprites, they do the same).
code for script
And in one second you get this file:
best_spritesheet_4x4.png
best_spritesheet_4x4.png (251.02 KiB) Viewed 1549 times
As you see, it's very compact file 600x576 and width = 600/4 = 150, high = 576/4 = 144. All empty fields are deleted.

One new sprite is 150x144, it looks like:
2018-05-18 20_52_17-best_spritesheet_4x4.png - paint.net v4.0.12.png
2018-05-18 20_52_17-best_spritesheet_4x4.png - paint.net v4.0.12.png (33.43 KiB) Viewed 1549 times
Here you see (screenshot is 200%) than the width in pixels is 94, it's very good for 3 tiles width entity (3 x 32 = 96 pixels by scale=1).

Much better to make it 3x3, square only.
Then I draw vertical line 47 pixels from the bottom and connect this point with the middle point of the sprite (dx = -28, dy = 21). New shift will be shift = {x=-28/32, y=21/32}.

Result code for your radar will be:

Code: Select all

pictures =
  {
    layers =
    {
      {
        priority = "high",
        width = 150,
        height = 144,
        line_length = 4,
        filename = new_filename, -- replace it with your filename --
        frame_count = 16,
        direction_count = 1,
        animation_speed = 0.5,
        run_mode = "forward-then-backward",
        shift =  {x=-28/32, y=21/32},
        scale = 1
      },
    },
  },
hr version must be twice bigger (also higher quality!), same shift as above and scale=0.5. That's all.

Re: Image Offset / Selection Box - Help

Posted: Fri May 18, 2018 8:02 pm
by TheSAguy
Thanks so much Darkfrei,

So using the above, I got the below:
Image

I know you have the off-set tool mod, but even with that, I'm still not entirely sure how to center the image.

Code: Select all

	animation =
    {
      layers =
        {
		{
				width = 150,
				height = 144,
				line_length = 4,
				filename = "__Bio_Industries__/graphics/entities/bio_drill/bio_drill_entity.png",
				frame_count = 16,
				direction_count = 1,
				animation_speed = 0.5,
				run_mode = "forward-then-backward",
				shift =  {x=-28/32, y=21/32},
				scale = 1,
          hr_version =
          {
				width = 150,
				height = 144,
				line_length = 4,
				filename = "__Bio_Industries__/graphics/entities/bio_drill/bio_drill_entity.png",
				frame_count = 16,
				direction_count = 1,
				animation_speed = 0.5,
				run_mode = "forward-then-backward",
				shift =  {x=-28/32, y=21/32},
				scale = 1,
	
          }
        },
		},
    },

Re: Image Offset / Selection Box - Help

Posted: Fri May 18, 2018 9:21 pm
by Arch666Angel
How is your selection/collision box defined?

Re: Image Offset / Selection Box - Help

Posted: Fri May 18, 2018 9:22 pm
by darkfrei
TheSAguy wrote:Thanks so much Darkfrei,

So using the above, I got the below:
Minus and plus are so difficult in this situation!
shift = {x=28/32, y=-21/32}

Please always press F9 before making screenshot, so shifting is much easy.

Re: [Done] Image Offset / Selection Box - Help

Posted: Fri May 18, 2018 11:55 pm
by TheSAguy
Thanks Darkfrei!
All good now :)

Image